Showing posts with label Design. Show all posts

6.25.2014

A Bathroom Makeover...


 ... in iphone photos. Because I'm lazy like that. :)

This happened ages ago, back when I was in my never-ending-depression-of-doom. At the time, projects were the only thing that got me out of bed. That and chocolate.

Now, ideally, if we were going to put money into remodeling a bathroom, it would be MY bathroom, not the kids'. Unfortunately, theirs took precedence once they'd flooded it one time too many and we ended up with water dripping thru the ceiling into the living room. Like so:


{I know it's odd to have an outlet in the ceiling, but we had the room wired for a projector. Then we bought a flatscreen and the projector never happened.}

Anyhow, this is where the kids' bathroom started:


I know. Breathtaking. I remember thinking that this particular green color {Martha Stewart's Hellebore} was so fresh. ha! Instead, it has always made me feel a bit seasick in there. Hindsight.

The fan is there to dry out what we thought was the subfloor. {It wasn't.}We ended up ripping that layer of particle board out, much to my relief. It looked too damaged to save.

I was determined to make the place more waterproof, which meant tile, tile, tile! We went to a local discount tile warehouse and picked out this baby:
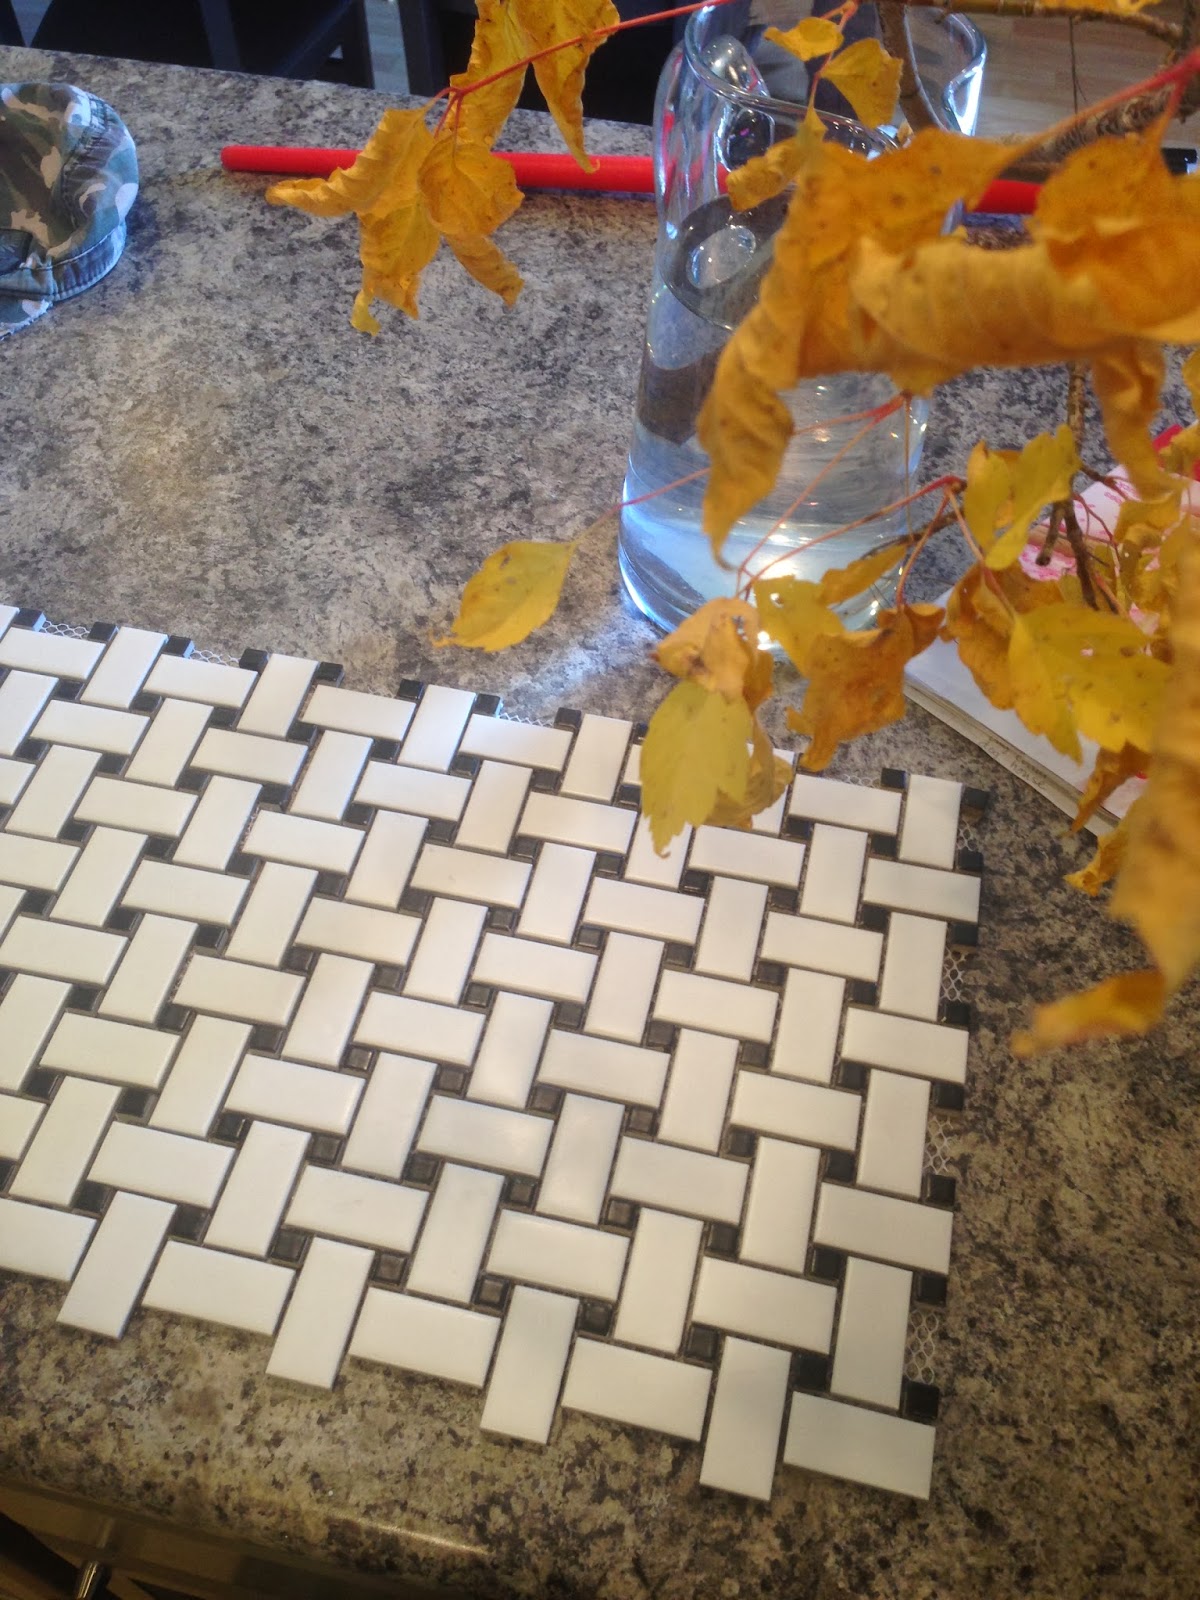

J really wanted a classic black and white checkerboard, but the basket weave felt more interesting to me. Also, it was a mosaic tile on a mesh background, which meant 1} they would be less likely to crack in an upstairs location, and 2) that tile-cutting would be much easier than it would be with large tiles.

After ripping out the particle board, we laid cement board {waterproof!} and then started putting in tile. Since the entire room was going to be a big mess, I also took the opportunity to paint the bathroom cabinets white, using the same BM Advance Paint that I used on my kitchen cabinets:


This is where I ran out of tile. {Math has never been my strong suite.} Back to the store!


After spending hours tiling, my eyes were at risk of developing permanent damage if forced to look at that green for one more second. I mixed every left-over can of blue paint I had and rolled over the kermit color.


So much better:


After all that came grouting! E was dying to help out, and I wasn't about to stop him. :) It turned out to be quite fun on the subway tile. For the floor, we used black grout and it was SOOOO messy. I think I was a bit over-vigourous in wiping it clean. I like the grout to feel flush with the tile-- not to divot in at all-- and I didn't quite achieve that with the floor. Still, it's a vast improvement over the laminate that was there before, and it feels good on the feet.


Just when J thought this project couldn't possibly cost another cent, I also went out and bought a new shower curtain, some shelves, hooks, and frames. You know, necessities.


I have to say, I loooooove it. Especially having hooks instead of a towel rod. Chances of having a towel actually make it off the floor increased from 0% to at least 10%.


This all happened back in November, which is really when I should have been doing outdoor stuff. Now it's 108 degrees outside and I'm stuck indoors when what I really want to do is build my shed. :( Brilliant planning on my part, I know.

Anyone have awesome projects in the works? Do tell.

12.16.2013

Guest Bath Update

Over the weekend, our entire family came down with a 24 hour stomach virus. It was disgusting and traumatizing and gave me all kinds of new-found respect for parents everywhere. 

Initially, I was going to post this makeover as a way to add a little pretty to my Monday, but then realized that I'd be posting a picture of a bathroom. Appropriate or ironic, I can't decide. Either way, this is the before:


Ignore the 60's ads hanging on the wall-- these were taken during our Mad Men New Years Party. We'd had the wasabi green color since we moved in, and while it wasn't completely offensive, it felt dated and unflattering. After:


It was a simple matter to paint the walls gray and hang some inexpensive shelves and artwork. Already it seemed more classic and less.... nauseating.


The 'before' vanity had a builder-grade mirror, that weird half-backsplash on the right hand side, and blonde-wood cabinets. With a little paint and a trip to Ikea, it became this:


My favorite addition was finally finding an excuse to buy this little turquoise rolling cart. I LOVE it. Plus, the kids no longer have an excuse for not replacing the toilet paper roll since the stash is right in front of them.


And that's that. I probably should have taken better photos with an actual camera and some good lighting, but you know. Sick. I'm lucky I made it this far.


How was your weekend?

12.03.2013

Card Catalogue Media Console


Remember those amazing drawers I spotted in an old plane hanger where my dad works? I loved the way they were perfectly imperfect. Handmade, weathered, layered with paint and labeled with yellowing masking tape. I snapped the above photo of them and then must have talked them up quite a bit, because a month or so later, my dad called to say that he'd bought them from his boss for a six pack of -er- drinks. ;)

We brought them home after I spent the summer with my parents again this year. We nearly killed ourselves lifting them onto the roof {those things are HEAVY} and burnt up the transmission. {I guess you can't go 80 mph over a mountain pass while hauling a few hundred pounds of card catalogues. Now you know.}

But it was worth it. Because I turned those drawers into this:


I'm in love. We can never, ever, ever move from this house because it will be impossible to budge this beast, let alone maneuver it out of a door; but still-- I'm in love. 

Here's how I did it:


I built it in a weekend, and since I was working alone, I chose to do it in the room where it would be placed. Because HEAVY.

The drawers were actually two separate pieces that had, at one point, been one unit. {Over the years, someone had cut it in half and stacked the two halves on top of each other, so I was just 'restoring' it.}

I bought two sheets of 3/4" Birch Plywood that I had cut to size at Home Depot. After drilling all my pocket holes and installing 5 vintage furniture legs on the bottom slab, I assembled the frame around the old card catalogue drawers and ended up with this:


That top shelf was waaay too tall. After conducting a quick poll via text-message, I confirmed that the rule of thirds was being blatantly violated and took a skill saw and fence to it to remedy the situation. Much better:


Next, I mixed up two batches of chalk paint using this recipe. One was a darker turquoise type blue called Araucana by Martha Stewart. The second was a light minty blue. {it was made by just mixing a bunch of leftover paint I had, so no name or brand, sorry.}

I painted the entire thing with Araucana first, then sanded it lightly before layering the minty blue on top of it and sanding it again. As I sanded, bits of the darker Araucana blue and even the original forest green would show through. Which is exactly why I wanted to use chalk paint-- I wanted this piece to have the weathered texture and patina that I loved, without having to incorporate forest green into my design scheme. ;)


After lots of painting and sanding {and cleaning up all the minty green dust left behind} I had to wax and buff the entire thing. Oh, those drawers. I had to wax Every. Single. One.


This is where the color really started to come alive. The wax somehow revealed all the layers that had been hidden under a dusty top coat:


See how it all looks mint green except for the waxed portion on the interior drawer? Suddenly you see the darker blue! So cool. {And Oh! How I love all that chipping!}


Next, I had to house all the media components and hide the wires. Most of those cables ended up in the wall, but I was glad for the hidden ledge for all the power strips and stuff.


Finally, I ordered 75 antique brass card catalogue pulls with brass screws, centered them as best I could, and printed off labels as a finishing touch.


And that, my friends, is how I ended up with the coolest media console EVER.

While I still haven't finished styling it, {I want to hang the television on the wall and perhaps replace all those books on the shelves with graphic black and white boxes like this and this} I have to say that I just may want to be buried in this thing. Yes, it would take a crane to lower it into the ground, but as with everything related to this beauty-- it would be worth it. :)


PS- I have conflicting emotions about the missing drawers. Too distracting? Adds character? I had planned on building replacements, but they're starting to grow on me. Maybe leave just two or three empty?


3.18.2013

Before & Afters


This post is completely random, {and yet totally real in its this-is-what-I-did-this-weekend kind of way}  filled with poorly framed, terribly lit iphone photos to boot! But it's too much to share over Instagram, so here we go. :)

As I mentioned before, J's home office is becoming the family project room; so we've moved his computer into the main living area. Unfortunately, even without the big-screen TV in the shot, this made the living room look like The House of Screens


I decided to eliminate the kid's computer {on the left} and cover the two lampshades in matching fabric {Thomas Paul's Dahlia in Aegean} to unify the space. I also added white drapes to the smaller window to lighten things up. 

After:


The Family Computer Station before:


The Family Computer Station after:


Side note-- I'm still working on adding color to the lamp on the right, am painting the side table on the left, and plan to replace the desk chair with this one:


And while the main wall is still in progress, here's a mini before:


And after:


Already it feels lighter, but I really can't wait to hang the TV on the wall and replace the console with a huge line of these awesome drawers that my Dad scored for me:


I'm going to add library pulls to them and they're going to look sa-weet!

Next up: building an ottoman. How was your weekend?

10.25.2012

Bedroom Glimpse


I've been talking about my bedroom makeover for a month now, and while it still isn't finished, here are a few tiny peeks before I ask for your advice. 

My current design plan can pretty much be summed up with one sentance: paint it white. J jokes that I'm creating a temple. :) {For those of you who are unfamiliar with LDS temples, they're completely furnished, painted, decorated and draped in white. Everyone inside also wears white.} 


The first project I completed when I came home was the headboard. It's thick, cushy, and wrapped in grey linen. I loooove it, though the tufting is borderline too traditional for me. I'm hoping that the clean lines and industrial vibe of other elements will help to make it read more 'eclectic'.


I'm in love with my little rolling IKEA cart, but currently it migrates around the house in search of the perfect nook. Too tall for a coffee table, not long enough for the end of the bed...


I'm painting my {very messy and un-styled} bookcase white. Then I'm filling it with all my white knick-knacks and covering my books in white craft paper. Naturally.

Here's the part where I ask for your advice:


I have an awesome mid-century dresser that I'd like to make two-toned. Do I go with option 1 and just paint the frame white, leaving the drawers and legs stained? Or do I go with option 2 and paint the drawer-fronts and leave the frame stained? The white, oil-based paint I bought is a much brighter white than the shell white that I painted the walls. Do you think that matters? {I'm currently leaning towards one of the options, but a second opinion may sway me.}


Also, I should note that the dresser appears a little darker and richer than the camera was able to capture. The color more closely matches the little vintage furniture feet I installed on the {upholstered!} box spring.

Of course, all this white will look a tad less stark once I have lamps, artwork, accessories and rugs placed, but that's for another day and another post. :)

Thoughts?

9.21.2012

Catalogued

photo by me

One of the projects that have been keeping me busy of late is redecorating my bedroom. It's been several years since I last decorated the room and I'm ready for something fresh and peaceful. I'm only partly through the process {photos soon, promise!} but this week while contemplating side tables, I found myself drawn to repurposed library card catalogues.

via Design*Sponge

They have some of the charm of vintage campaign chests but with the added draw of a literature reference, which I think makes them more 'me'.

via Style by Emily Henderson

I think this one {above} is my favorite. Wouldn't it make the perfect side table? And those hairpin legs-- I die!

via Craigslist

A quick search revealed a few {very expensive} options on Craigslist and Etsy. They seem to range anywhere from $400 to $1000 plus shipping. Yikes!

via Etsy

Of course, I could attempt a variation on the ubiquitous Ikea Moppe hack-- I'd use these vintage brass pulls and these hairpin legs. It could work, no?

via The Painted Hive

And these are just the thoughts that came to me as I fell down the card catalog rabbit hole-- there are endless other possibilities as far as end tables/nightstands go!

What do you use beside the bed?


Related Posts Plugin for WordPress, Blogger...